
How to cook beef liver for dogs safely: keep it plain and either simmer similar-size pieces, bake them in one layer at 375°F, or heat thin strips to 160°F before dehydrating at 140°F. A food thermometer—not color or the clock—decides when the meat step is complete. Cool with clean tools, weigh and dice the batch, refrigerate only a short working supply, and freeze the rest in labeled small portions.
Cooking improves food safety; it does not make liver unlimited. Beef liver is concentrated in preformed vitamin A, so method and portion are two separate decisions. The workflows below cover cooking, cooling, and storage. For routine amounts and frequency, use the separate beef-liver amount and frequency guide.
How to Cook Beef Liver for Dogs: The Short Method
| Method | Setup | When to start checking | Finish control |
|---|---|---|---|
| Gentle simmer | Similar-size pieces in plain water | Around 10 minutes; many small batches take about 10–15 minutes | 160°F in several thick pieces |
| 375°F bake | Single layer on parchment, no oil | Around 15 minutes; many moderate pieces take about 15–22 minutes | 160°F in several thick pieces |
| Heat, then dehydrate | Strips no more than about 1/4 inch thick; heat first, then a preheated 140°F dehydrator | Begin the cooled bend test around 3 hours after drying starts | Verified 160°F heat gate plus a fully dried cooled test strip |
These times tell you when to begin checking, not when every batch is guaranteed done. Starting temperature, piece thickness, pot or tray load, oven accuracy, altitude, and appliance airflow all move the clock. If a thick piece has not reached 160°F, keep cooking and check again.
Use only plain food-grade beef liver. Do not add onion, garlic, leek, chive, salt, butter, oil, broth, stock, alcohol, sauce, gravy, breading, or seasoning. Picking liver out of a seasoned dish does not return it to a plain ingredient.
What You Need Before You Start
- Food-grade beef liver with a known cold-storage history and no leaking package, sour or rotten odor, unusual slime, or uncertain time at room temperature.
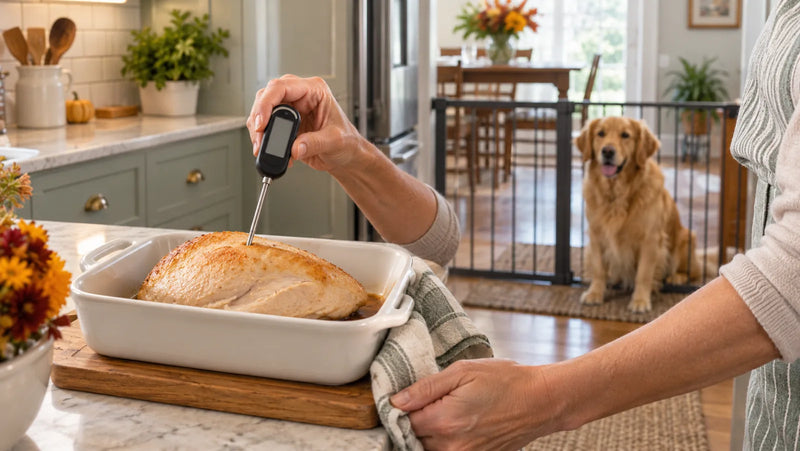
- A food thermometer with a thin probe that can enter a thick test piece from the side.
- A raw-meat board and knife kept away from produce, cooked food, bowls, phones, and the dog’s feeding area.
- A pot and slotted spoon for simmering, or a parchment-lined sheet pan and clean tongs for baking.
- A clean cooked-food plate or tray that never held the raw liver.
- A kitchen scale for weighing the cooked batch and measured freezer portions.
- Shallow containers or a freezer tray plus dated labels for small batches.
- A dehydrator only if you will use a verified heat step first and can clean the trays thoroughly.
Do not rinse raw liver. Splashing can move raw juices to the sink, faucet, nearby dishes, counters, and clothing. Open the package in the raw-food zone, trim there, and wash hands and contacted tools before touching cooked liver or clean storage containers.
Keep the dog out of the kitchen while raw liver is being handled. A baby gate or closed door prevents counter surfing, dropped-piece access, and contact with a contaminated board or trash bag. Secure the absorbent pad, plastic wrap, foam tray, butcher paper, and any string immediately.
Trim and Cut for Even Cooking
Cold liver is easier to handle than soft room-temperature liver. If the package is very floppy, place it in the freezer briefly until firm enough to slice but not frozen solid. Work quickly and return anything not being cooked to the refrigerator.
- Remove obvious tough connective tissue. Do not spend so long trimming that the liver warms on the counter.
- Choose one thickness for the batch. Similar pieces finish more predictably than a tray containing paper-thin edges and thick lobes.
- Keep a thick test piece. Very thin pieces are hard to probe accurately. Insert the thermometer horizontally through the side so the sensing area stays inside the meat rather than touching the pan.
- Cut dehydrator strips no more than about 1/4 inch thick. The drying guidance below depends on thin, even strips and a heat step.
- Do final training-size dicing after cooking and cooling. Larger cook-stage pieces are easier to measure with a thermometer; cooled liver is easier to weigh cleanly.
Do not use piece count as a nutrient measure. One “slice,” “cube,” or “lobe” can vary widely in weight. A scale lets you record what the batch actually produced, divide it into known freezer portions, and avoid gradually increasing the size because the last batch looked different.
Method 1: Boil or Gently Simmer Beef Liver
- Place similar-size liver pieces in a clean pot and add enough plain water to cover them.
- Bring the water to a controlled simmer. A violent rolling boil can break edges apart without proving the centers are done.
- Begin checking a small batch around 10 minutes. Many moderate pieces finish in roughly 10–15 minutes, but thickness and load can move the finish outside that range.
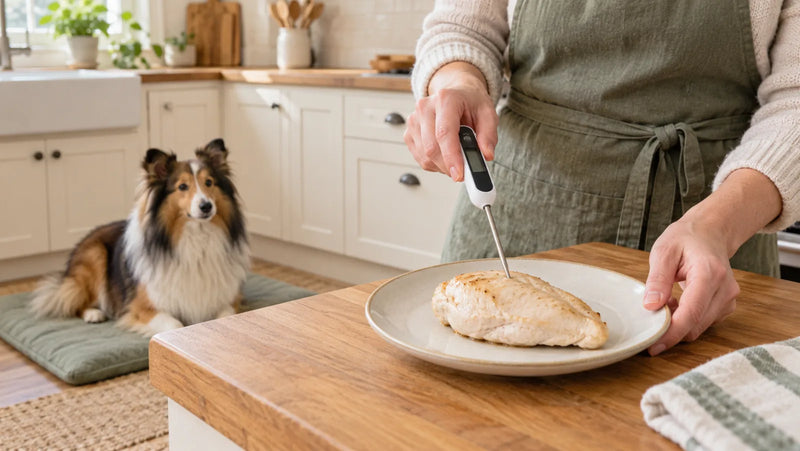
- Lift several of the thickest pieces with raw-zone utensils and check from the side. Continue cooking until each tested piece reaches at least 160°F.
- Move the finished liver to a clean plate or shallow tray with clean utensils. Do not return it to the raw board or reuse the raw tongs.
Simmered liver stays relatively moist and soft, which can make it easy to dice after cooling. That moisture also means it is perishable. Drain it, spread it in a shallow layer so heat can escape, and move it into the refrigerator or freezer promptly rather than leaving a deep warm bowl on the counter.
The cooking water is not a free dog broth. It can contain rendered material and small liver particles, and its calorie or nutrient concentration is unknown. Discard it unless a veterinarian-formulated recipe specifically accounts for the liquid.
Method 2: Bake Beef Liver at 375°F
- Preheat the oven to 375°F and line a rimmed sheet pan with parchment. Add no oil or cooking spray.
- Arrange the liver in one layer with space between pieces. Do not overlap or stack them.
- Begin checking around 15 minutes. Many moderate pieces take about 15–22 minutes, but thin edges may firm before thick centers are ready.
- Probe several thick pieces horizontally. Continue baking until each tested center reaches at least 160°F.
- Transfer with clean tongs to a clean shallow tray and cool promptly.
Baking can create a slightly firmer exterior than simmering, which some cooks find easier to handle. Exterior browning, a dry-looking edge, or the absence of pink is not the safety test. Color varies, and the center of a thick piece can lag behind the surface.
If the pan has both very thin and thick pieces, remove only the pieces that have individually passed the thermometer check and keep the rest cooking. A full tray does not earn one shared temperature from its thinnest corner.
Method 3: Heat First, Then Dehydrate
A home dehydrator removes moisture; it should not be treated as the only cooking control for raw beef liver. The National Center for Home Food Preservation jerky guidance uses a 160°F meat heat step and a preheated 140°F dehydrator, with strips no more than about 1/4 inch thick. Apply that cautious sequence to plain liver strips.
- Slice evenly. Partially chilled liver is easier to cut into strips no more than about 1/4 inch thick.
- Heat the strips first. Steam or oven-heat them without seasoning until several representative thick strips reach 160°F. Use a thin thermometer horizontally where possible.
- Change tools and trays. Transfer the heated strips with clean utensils to clean dehydrator trays.
- Dry at 140°F. Leave airflow around each strip; do not overlap pieces.
- Begin checking around three hours. Cool one test piece before judging it. Properly dried jerky-like strips should crack but not break when bent; liver may be more brittle than muscle meat, so also inspect the thickest center for retained moisture.
- Continue as needed. Time varies with thickness, load, appliance airflow, humidity, and the moisture left after the heat step.
- Cool completely before packing. Warm pieces can create condensation inside a container.
Do not call a home batch shelf-stable because it feels dry. Commercial products use item-specific process controls, packaging, water-activity or moisture evidence, and shelf-life work that a kitchen timer does not reproduce. Refrigerate or freeze home-dehydrated liver in small dated batches unless you have a validated process for that exact food, thickness, equipment, package, and storage condition.

Boiled vs Baked vs Dehydrated Beef Liver
| Decision | Gentle simmer | 375°F bake | Heat, then dehydrate |
|---|---|---|---|
| First check | Around 10 minutes | Around 15 minutes | Around 3 hours into drying, after the 160°F heat step |
| Safety control | 160°F in several thick pieces | 160°F in several thick pieces | 160°F before drying plus cooled dryness check |
| Typical handling | Soft, moist, easy to dice | Firmer surface, less wet handling | Dryer strip, potentially brittle |
| Storage posture | Perishable; refrigerate briefly or freeze | Perishable; refrigerate briefly or freeze | Cold-store conservatively unless the exact process is validated |
| Potential use | Small soft pieces at home | Measured cubes or slices | Portable dry pieces after safe preparation |
| Main mistake | Trusting hot water instead of the thermometer | Trusting browning instead of the thermometer | Putting raw liver directly in the dehydrator and assuming “dry” means safe |
No column earns a larger liver allowance. Water loss changes weight and concentration, so ten grams of a dried product is not equivalent to ten grams of simmered liver. Compare dog treats by the actual item, measured portion, calories, label, and role rather than by the method name alone.
For commercial format differences in texture, crumbs, handling, and label evidence, use the beef-liver treat format comparison. For poultry-specific temperature and cross-contamination steps, see how to cook chicken liver for dogs.
Cool, Weigh, Dice, Refrigerate, and Freeze
Cooling and portioning are part of the recipe, not cleanup after it. Use clean tools and a clean zone that never touched raw liver.
- Spread the cooked liver shallowly. Do not leave it piled in a deep hot bowl.
- Start the clock when cooking ends. The FoodSafety.gov cold-storage chart uses three to four refrigerated days for cooked meat leftovers. Refrigerate within two hours, or within one hour when the surrounding temperature is above 90°F.
- Weigh the finished batch. Record the cooked weight and date. Do not estimate from the raw package weight because cooking changes water and yield.
- Dice after cooling. Cut pieces small enough for the dog’s mouth and training job, then weigh the planned portion instead of counting inconsistent cubes.
- Keep only a short refrigerator supply. Freeze the rest promptly in small, flat, labeled portions so one training pouch does not require repeated thawing of the whole batch.
- Thaw in the refrigerator. Move only the next portion from freezer to refrigerator and discard anything with an uncertain handling history.
A label should include the food, cooked date, weight, and method. If more than one dog has a different plan, label by dog as well. Keep liver separate from human leftovers so it is not accidentally seasoned, combined with a sauce, or mistaken for an unlimited snack.
Do not freeze a warm sealed container; trapped steam becomes ice and moisture. Let pieces cool promptly in a shallow arrangement, then package and freeze. Likewise, do not keep taking a moist training pouch in and out of the refrigerator for days. Portion smaller so the working amount is used promptly.
What the AAFCO Vitamin A Maximum Means by Body Weight
The scheduled body-weight math below answers a narrow question: what happens if an AAFCO maximum for a complete food is converted through a public cooked-beef-liver reference? It does not calculate how much liver a dog should eat.
The linked AAFCO dog-food nutrient profile appendix lists a vitamin A maximum of 62,500 IU per 1,000 kcal of metabolizable energy for complete dog food. That equals 62.5 IU per kcal for the whole formulated diet. The USDA FoodData Central SR Legacy record 168626 lists braised beef liver at 31,714 IU vitamin A per 100 grams, or 317.14 IU per gram.
The daily-energy examples are back-calculated from the WSAVA treat guide’s body-weight table, which prints the 10% treat allowance for an average healthy adult dog; multiply that row by ten. Actual energy needs vary with age, neuter status, activity, environment, body condition, health, and diet.
| Dog body weight | Daily energy implied by WSAVA's 10% treat table | AAFCO complete-food maximum at 62.5 IU/kcal | Theoretical braised-liver equivalent at 317.14 IU/g |
|---|---|---|---|
| 2 kg / 4.4 lb | 140 kcal | 8,750 IU | About 28 g—not a serving |
| 4 kg / 8.8 lb | 240 kcal | 15,000 IU | About 47 g—not a serving |
| 6 kg / 13.2 lb | 320 kcal | 20,000 IU | About 63 g—not a serving |
| 10 kg / 22 lb | 470 kcal | 29,375 IU | About 93 g—not a serving |
| 20 kg / 44 lb | 790 kcal | 49,375 IU | About 156 g—not a serving |
| 30 kg / 66 lb | 1,070 kcal | 66,875 IU | About 211 g—not a serving |
| 40 kg / 88 lb | 1,330 kcal | 83,125 IU | About 262 g—not a serving |
Do not feed toward these numbers. The AAFCO value is a maximum concentration for a complete formulated food, not a treat target, one-day toxicity threshold, or safe beef-liver dose. The dog’s main food already supplies vitamin A, and other organ treats, cod-liver oil, multivitamins, toppers, and supplements may add more. Subtracting an unknown food value and filling the “remainder” with liver is not a valid home calculation.
The food record is also for braised beef liver. Your raw starting material, simmered batch, baked batch, dehydrated strip, or commercial freeze-dried product can have a different water content and nutrient concentration. The table’s purpose is to show why a formulation maximum cannot be turned into a casual portion by body weight.
Count Calories and Vitamin A Separately
WSAVA recommends keeping all treats and extras below 10% of daily calories so complete-and-balanced food supplies at least 90%. That is a shared ceiling for training rewards, chews, toppers, table bites, fruit, and liver. It is not permission to devote the entire 10% to liver.
Vitamin A creates a separate constraint. A gram amount can fit the calorie budget and still be an unnecessarily concentrated recurring liver habit. The Merck Veterinary Manual’s small-animal nutrition chapter notes that feeding only liver can induce vitamin A toxicity. That does not mean one tiny properly used piece is poisoning; it means repeated unmeasured liver should not displace a balanced diet.
For the nutrient role and its limits, read the benefits and limits of beef liver. The broader organ-meat guide for dogs explains why liver, heart, gizzard, kidney, and lung are not interchangeable.
Dogs Who Need Veterinary Guidance Before Liver
- Puppies: growth diets have tight nutrient targets. Use the beef liver for puppies guide and ask the veterinarian rather than copying an adult table.
- Pregnant or nursing dogs: reproductive nutrition should be formulated, not adjusted with casual organ servings.
- Dogs on prescription or elimination diets: one unauthorized protein or organ can defeat the plan.
- Dogs with copper-associated liver disease or another liver condition: beef liver may conflict with a controlled nutrient plan.
- Dogs with pancreatitis, hyperlipidemia, or a prescribed low-fat diet: use only an approved food and portion.
- Dogs with kidney disease or another medically managed diet: the organ’s name does not identify an appropriate treatment food.
- Dogs eating a homemade diet: a board-certified veterinary nutritionist should set the complete formula and liver weight.
- Dogs receiving cod-liver oil, vitamin A, or a multivitamin: list every source before adding liver.
If a dog steals a large amount, record the type, amount, cooking method, added ingredients, time, dog’s weight, health conditions, supplements, and symptoms. Repeated vomiting or diarrhea, marked lethargy, weakness, abdominal pain or swelling, inability to keep water down, tremors, breathing trouble, or collapse needs prompt veterinary advice. Do not induce vomiting or give a home remedy unless a veterinary professional directs it.
A Ready-Made Beef Liver Option When You Do Not Want to Cook
Home cooking means handling raw liver, verifying temperatures, cleaning tools, cooling promptly, and maintaining short cold storage. If those steps do not fit, a labeled ready-made product can be easier to count and store.
The current American Paws freeze-dried beef liver training treats page lists one ingredient—100% USA beef liver—approximately 5 kcal per piece, and an intermittent or supplemental feeding role. The product is packed by American Paws in Highland, California. Those facts apply to that exact product, not every item in the catalog.
A freeze-dried piece is not nutritionally identical to the braised FoodData Central record or to a moist home-cooked cube. Do not copy the table’s grams onto the package. Use the live product label, break pieces when appropriate, count calories, and keep the same small shared treat budget.
You can also compare current American Paws dog treats by ingredient, calories, texture, and feeding directions. The collection is not uniformly made from liver or limited to one ingredient, so check the exact item every time.
Frequently Asked Questions
How long should beef liver boil for dogs?
Begin checking a small batch around 10 minutes at a gentle simmer; many moderate pieces take roughly 10–15 minutes. The timer is only a first-check cue. Keep cooking until several of the thickest pieces reach at least 160°F.
What internal temperature should beef liver reach?
Use 160°F as the verified meat heat gate in this workflow. Check several thick pieces with a food thermometer inserted horizontally. Color, firmness, simmering water, or a browned surface cannot replace the reading.
Can I bake beef liver without oil?
Yes. Place plain pieces in one layer on a parchment-lined rimmed sheet pan at 375°F. Begin checking around 15 minutes and continue until several thick centers reach 160°F. Oil, butter, salt, and seasoning are unnecessary.
Can I put raw beef liver directly in a dehydrator?
Not in this cautious method. Slice no thicker than about 1/4 inch, heat representative pieces to 160°F first, then transfer with clean utensils to a preheated 140°F dehydrator. Dry fully and cold-store the home batch conservatively.
How long does cooked beef liver keep in the refrigerator?
FoodSafety.gov uses three to four days for cooked meat leftovers when promptly refrigerated at a safe temperature. Keep only a short working supply and freeze the rest immediately in measured portions. Discard liver with an uncertain time-temperature history.
Can I freeze cooked beef liver for dogs?
Yes. Cool it promptly in a shallow layer, weigh and divide it into small labeled portions, then freeze most of the batch. Thaw the next portion in the refrigerator instead of repeatedly warming and refreezing the full batch.
Does cooking remove enough vitamin A to make liver unlimited?
No. Cooking changes water and some nutrients, but it does not turn liver into an unlimited food. Keep it measured, count every extra, and use the dog’s complete diet and veterinary plan rather than a theoretical maximum.
Cook the Batch Safely, Then Keep the Portion Small
The reliable workflow is simple: cook plain liver, let a thermometer—not the clock—verify 160°F, keep raw and cooked tools separate, cool promptly, weigh the finished batch, and freeze small dated portions. Simmering, baking, and heat-first dehydration change texture and storage handling; none turns liver into a meal or daily target.
If you do not want to manage the raw-kitchen workflow, choose a current labeled dog treat with a countable calorie value and an ingredient that fits the dog. For beef-tolerant dogs, the ready-made freeze-dried beef liver option provides a practical alternative; for routine amount decisions, return to the dedicated portion guide and let a veterinarian adjust the plan when health or a homemade diet changes the rules.